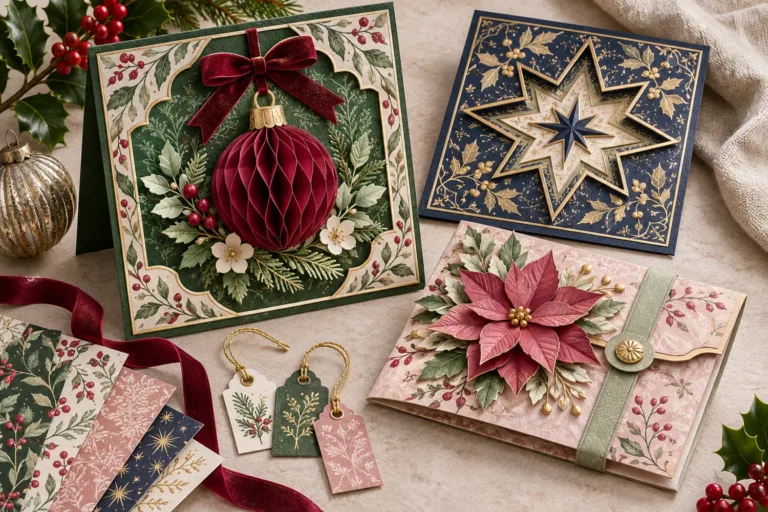
Christmas Gift Tag Ideas with Printable Tags and Tickets
Christmas gift tag ideas become much easier when the little paper pieces work together. A botanical tag can finish a wrapped present, a starry ticket can hold a memory in a journal, and a floral tag can become the focal point of a card. The useful part is the same: a small illustrated border with room for your own words.
Below are six ways to use tags and tickets, plus two free printable sheets created for pngdiy.com. Choose traditional greenery and midnight stars, or blush poinsettias and gingerbread details. Each sheet comes in A4 and Letter, with four tags and four small tickets ready to cut.
Quick answer: print your chosen PDF at Actual size or 100%, cut around the outlines, write your message and attach the piece with fine cord or a paper band. The tags measure 50 x 85 mm; the tickets measure 64 x 25 mm. A plain backing layer and one small finishing detail are enough to turn the print into a coordinated project.
Free printable Christmas tags and tickets
The two sheets share the same practical shapes but have different illustrated artwork. Each one contains two copies of each tag style and four coordinating decorative tickets. Print one sheet for a few small projects, or repeat it for a larger batch of gifts.
Botanical and Midnight
Choose this sheet for fir branches, holly berries, warm ivory and navy star details. The botanical tags suit kraft wrapping and red or green ribbon; the midnight design makes a darker contrast beside cream paper and gold-colored cord.

Blush and Gingerbread
This sheet pairs soft poinsettias and sage foliage with warm gingerbread illustrations. Use blush beside ivory or dusty-rose paper, and the gingerbread pieces beside caramel, cocoa or a restrained red stripe.

The previews above show the flat sheets you will print. The styled project scenes below add backing papers, pockets, ribbons and dimensional details to show how you can finish them. Gold-colored details in the PDFs print as flat color; real metallic thread, foil paper or ribbon adds physical shine.
What you need before you start
- Paper: matte cardstock around 180-220 gsm is a useful starting point for tags if your printer supports it. For thin journal tickets, lighter paper or cardstock can keep the page less bulky.
- Cutting tools: scissors for the clipped tag corners, or a ruler and craft knife on a cutting mat for straight edges. A small hole punch finishes the printed circle.
- Adhesive and backing: a glue stick or double-sided tape, a scrap of plain cardstock and, if you want depth on a card front, a few thin foam pads.
- Finishing details: fine cord, narrow ribbon, a small paper sprig or a folded star. Choose one detail that repeats a color from the print.
For more combinations, use our Christmas color palettes. Pick a main shade, a light writing area and one accent before choosing ribbon or extra paper. This is especially helpful when the wrapping and the tag both have a pattern.
How to print, cut and finish the tags
- Download the correct paper size. Use the A4 PDF for A4 paper or the Letter PDF for US Letter. Open the file in a PDF viewer rather than printing the small website preview.
- Print at Actual size or 100%. The sheet includes a reference line that should measure 50 mm, or about 1.97 inches. If it prints smaller, remove a Fit or Shrink setting and try one test page.
- Cut around the outer outline. The full tag is 50 x 85 mm, approximately 1.97 x 3.35 inches. The decorative ticket is 64 x 25 mm, approximately 2.52 x 0.98 inches. Leave the illustrated rectangle inside the tag intact.
- Punch and write before attaching. Use the small circle as the hole guide, then write the name or message while the tag lies flat. Let the ink dry before threading cord through the hole.
- Add a backing if you want more definition. Trace the tag onto plain paper and leave a narrow border around it. Glue the layers together and line up their punched holes. For a journal pocket, keep the extra layers thin.
Start with one test sheet on the paper you plan to use. Dark navy, soft pink and warm ivory can look different on a screen and in print. Once the color and the reference line look right, print the rest of your batch.
Christmas gift tag ideas to make with the sheets
Use the projects as styling ideas rather than a list of extra materials you must buy. The illustrated tag or ticket supplies the main pattern; the supporting paper and finishing details connect it to the gift, card or journal.

A botanical tag turns a plain box into a present
Everything on this page grows from one print run: a sheet of tags, a pair of scissors and a ribbon in a colour you already have.
The pin shows the first idea in its finished form — a large botanical tag on a wrapped gift, with a cranberry band behind it. Print the sheet, cut the outline, and the same look sits on your own parcel today.
1. A layered botanical tag for a wrapped gift
A leafy border feels at home beside kraft paper, cranberry and deep green. Give the tag a plain dark backing so its light writing space remains clear even when the wrapping is patterned.

- Cut an Evergreen Botanical tag from the Botanical and Midnight sheet. Mount it on a slightly larger forest-green scrap and punch through both layers.
- Wrap the gift, add a flat cranberry paper band and tie the tag to the band with fine cord. Keep the knot away from the writing area.
- Finish with one small paper sprig or a few berry details at the tag base. Repeat the same green somewhere else on the package.
For a small gift, let the tag be the main decoration. A large bow can cover the printed border and compete with the name.
2. A midnight ticket for a journal pocket
A ticket gives you just enough room for a date, a place or one detail worth remembering. The navy-and-ivory combination makes a small paper piece easy to find on a richly patterned December page.

- Choose a Midnight Stars ticket and write a short memory on its lines. For example, note where you went and the detail you want to remember.
- Slip it into a low paper pocket with enough of the ticket showing to grasp. Add a matching tag behind it if you want a second writing surface.
- Repeat one small star or ivory strip on the pocket front. Keep the pocket attached on three sides so the opening remains usable.
For a full page, our junk journal pocket ideas offer more ways to hold notes and small keepsakes.
3. A floral tag as the focal point of a card
A gift tag does not have to hang from a present. Mounted on a card front, its long shape gives the composition direction and leaves a calm place for a handwritten greeting.

- Start with an ivory card and a blush patterned-paper panel. Add a narrow dusty-rose mat between the two.
- Place a Blush Poinsettia tag at a gentle angle, fully inside the card front. Write a short greeting before fixing it with tape or a few thin foam pads.
- Build a small paper-flower cluster near one end of the tag, keeping the middle readable. Use a matching ticket inside the card for a private note.
If the card will go through the mail, keep the front flatter and save the dimensional flower cluster for a hand-delivered card.
4. A gingerbread tag with a little note envelope
Warm cream, caramel and a fine red stripe make a cozy companion for a handwritten Christmas note. The envelope holds the message; the illustrated tag gives the outside its character.

- Fold or choose a small envelope that comfortably holds your note. If the tag goes inside too, allow space around its 50 x 85 mm outline.
- Wrap a narrow striped paper band around the closed envelope. Attach a Gingerbread Keepsakes tag to the band, or slip a small ticket beneath it.
- Repeat one cocoa or caramel detail on the note card inside. Keep the envelope flap free so the reader can open it without tearing the decoration.
For a different envelope size, use our Template Maker to plan the outline around the card you want to enclose.

One style of tags for the whole pile of gifts
A repeated palette is what makes a table of presents look planned — the two sheets hold the cream botanical tags and the navy star ones in one style.
The pin above is the fifth idea: gifts wrapped in the same two colours, each with its own tag. Take any two sheets, wrap, and the pile already matches.
5. A coordinated set of gifts with different tags
Matching gifts do not need identical wrapping. A repeated ribbon color and related tag artwork can connect a kraft package, a navy box and an ivory parcel while keeping each one distinct.

- Choose one printable sheet for the whole group. Alternate its two tag styles rather than mixing every design you own.
- Repeat one finishing material across the gifts: fine gold-colored cord, a narrow velvet ribbon or the same plain paper band.
- Put a matching ticket beneath each band for a short extra note. Keep the recipient name on the visible tag so the gifts remain easy to sort.
Mix one busy paper with one quieter surface. Our Christmas scrapbook paper collection has previews and links to original paper sets if you want more pattern options.
6. A tag that carries a personal message
A short note can make the tag worth keeping after the gift is opened. Give the message a folded cream insert or a journal pocket so the decoration does not take over the writing space.

- Cut a plain note insert slightly smaller than your printed tag. Fold it if needed and attach the back of the tag to its front, leaving the writing flap free.
- Write something specific: a shared December memory, why you chose the gift or a small plan for the coming year. A few personal lines are enough.
- Slide the piece into a thin pocket or tie it to a parcel. For a journal page, keep the pocket and the open note entirely within the page margins.
Leave a little room around the note before gluing the pocket down. The finished piece should open and slide out without catching on the decorative layers.
Finishing details that make the pieces feel coordinated
Repeat one motif and one material. A little fir sprig on a tag can echo the botanical paper around the gift; a folded star can connect a navy ticket to a card. The effect comes from the relationship between the pieces, not from filling every empty area.
- Keep the writing area quiet. Place ribbon, foliage and raised details around the border so names and messages remain easy to read.
- Use contrast between layers. A thin dark backing separates a cream tag from pale wrapping. A light mat helps a navy ticket stand out on a dark pocket.
- Match the thickness to the purpose. A parcel tag can carry a little relief. A ticket tucked into a journal is easier to use when it stays flatter.
For another small accent, browse our vintage Christmas stamps and ephemera or Christmas clipart. Those collection pages show designer previews, project ideas and links to the original external sets. The four PDF files in this article are our own printable sheets and download directly from pngdiy.com.
Questions about printable Christmas gift tags
Are these Christmas gift tags free to print?
Yes. The two illustrated sheets linked above are free to download from pngdiy.com in A4 and Letter. Each sheet contains four gift tags and four decorative tickets. Print them for your own wrapping, cards and journals.
What size are the tags and tickets?
At 100%, each tag measures 50 x 85 mm, or approximately 1.97 x 3.35 inches. Each ticket measures 64 x 25 mm, or approximately 2.52 x 0.98 inches. The reference line on the page lets you check the printer scale before cutting.
Can I use the tickets in a junk journal?
Yes. Use them for a date, a place, a short memory or a little note inside a pocket. Choose thinner paper when you want to avoid adding too much bulk to a journal page.
How do I make a printed tag look more finished?
Add a narrow plain backing, a tidy punched hole and one fine cord or ribbon. If you want a layered look, repeat one small motif from the print and keep the middle clear for writing.
Will the gold details print metallic?
No. The gold-colored details print as ordinary flat color. Use metallic thread, foil cardstock or a narrow real ribbon if you want shine on the finished project.
Choose one sheet and finish one tag before cutting the whole page. Once you like the paper, the cord and the amount of layering, repeat that small set of decisions across the rest of your Christmas projects.